2. Getting Started
This guide walks you through the installation of Asset Manager.
2.1 Prerequisites
Asset Manager current runs only on Mac OS X 10.5 or higher. Windows is not supported at the moment.
Asset Manager requires Max/MSP 5 (http://cycling74.com/downloads/) full installation or Runtime installation. Max/MSP license is not required to run Asset Manager.
2.2 Download Asset Manager
Download Asset Manager v1.2.1 (US Mirror)
You may also find the older releases here.
Double click the file in Finder to unpack the content. After unpacking the file, you can move the Asset Manager folder in any convenient location. Keep the folder structure and contents inside the folders intact.
2.3 Folder Structure
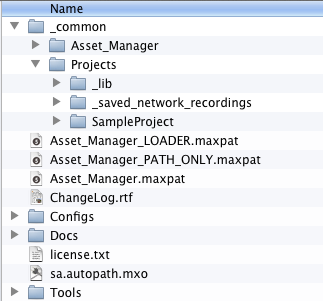
The above image shows the folder structure inside the main Asset Manager folder.
_common includes all for running Asset Manager, except for the configuration file.
_common/Asset_Manager includes all files necessary to run Asset Manager.
_common/Projects includes project files and extra libraries for projects.
_common/Projects/_lib is the default location for storing all Max patch abstractions, external objects and other dependencies for projects.
_common/Projects/SampleProject is, as the name suggests, a sample project file that exemplifies what a Asset Manager projects are like. This is a good place to get to know core abstractions patches that let you integrate your projects into Asset Manager.
The use of Asset_Manager_LOADER.maxpat, Asset_Manager_PATH_ONLY.maxpat, and Asset_Manager.maxpat are explained below in 2.5 Run Asset Manager.
ChangeLog.rtf includes all changes to the software up to the current version.
Configs includes configuration file. More detail explanations of the configuration files and their syntax can be found in section 4. Config Files.
Docs includes this documentation.
license.txt includes the license enforced by University of California, San Diego.
sa.autopath.mxo is used to add search paths dependent for running Asset Manager to Max/MSP environment. The file is dependent for Asset_Manager_LOADER.maxpat and Asset_Manager_PATH_ONLY.maxpat.
Tools includes miscellaneous tools that can be used with Asset Manager. More in section 8. Miscellaneous Tools.
2.4 Configuration File
Asset Manager, like other Tahakum Framework, uses a plaintext configuration file to setup the runtime environments.
The following shows an example of the main Asset Manager configuration file located in Configs/am_config.txt.
// am_config.txt
//
// Updated v1.2.0
//
// This is the main configuration file for Asset Manager.

//------------------------------------------------------------------
// Configs
//------------------------------------------------------------------
// System level configurations.
//
// Syntax:
//  Variable = Values
//
Configs {
    // Specify hardware input and output channels
    // Hardware I/O are mapped to virtual I/O in ascending order. For
    // example, if hardware inputs are specified as "1 3 5 7", virtual
    // inputs are mapped to "1 2 3 4".
    Inputs = 1-2 4-5
    Outputs = 1-8

    // Maximum number of projects that can run concurrently
    MaxActiveProjects = 10

    // Set the master output level in dB. Max is +9.6dB. Default is -inf.
    MasterLevel = 0.0
    // Set the volume limiter for absolute maximum volume.
    // Currently the values are limited to -24dB to +24dB.
    LimiterLevel = 0.0
}

//------------------------------------------------------------------
// Projects
//------------------------------------------------------------------
// List all OSC Address Patterns and the associated projects.
// Project name and the folder name should be identical.
//
// Syntax:
//     OSCAddressPattern = "ProjectName" [config file] [autoload]
//
// OSCAddressPattern    Should not include any spaces.
// ProjectName          Project name must be identical to the project's
//                      folder and its main patch. The name can include
//                      spaces as long as it is surrounded by double
//                      quotes.
// [config file]    (Optional) Specify the config file that the project
//                      should load on start. If the config file is not
//                      specified, Asset Manager will try to load
//                      {ProjectName}_config.txt as the default.
// [autoload]           (Optional) Specify a keyword "autoload" to
//                      load the project on startup. Additionally, projects
//                      that are specified as autoload will not respond to
//                      remote network load and unload messages. i.e. the
//                      projects can only be loaded/unloaded using the main
//                      graphical user interface.
// [mute]               (Optional) Specify a keyword "mute" to set projects
//                      that are set to "autoload" to mute DSP when loaded.
Projects {
    /SampleProject = SampleProject autoload
}
You can find more information about the main configuration file and projects configuration files in 4.1 am_config.txt file section.
2.5 Run Asset Manager
Open Asset_Manager_LOADER.maxpat to start Asset Manager. Asset Manager requires search paths to be setup correctly on startup, and Asset_Manager_LOADER.maxpat takes care of setting this up and starting the main patch.
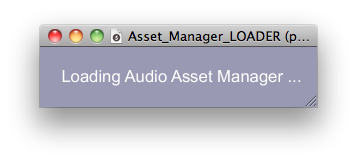
After opening Asset_Manager_LOADER.maxpat you may briefly see a window with a message "Loading Audio Asset Manager ...".
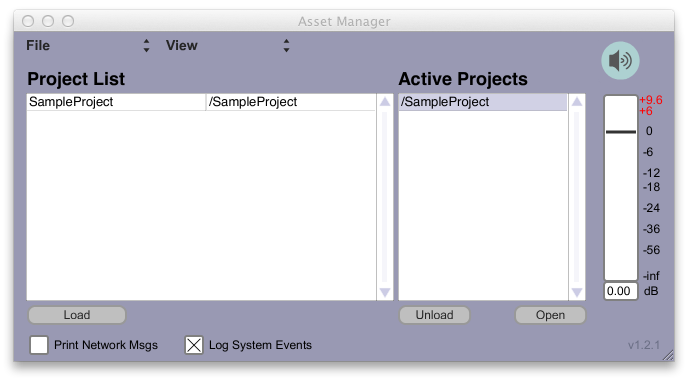
Then you should see the following main Asset Manager window.
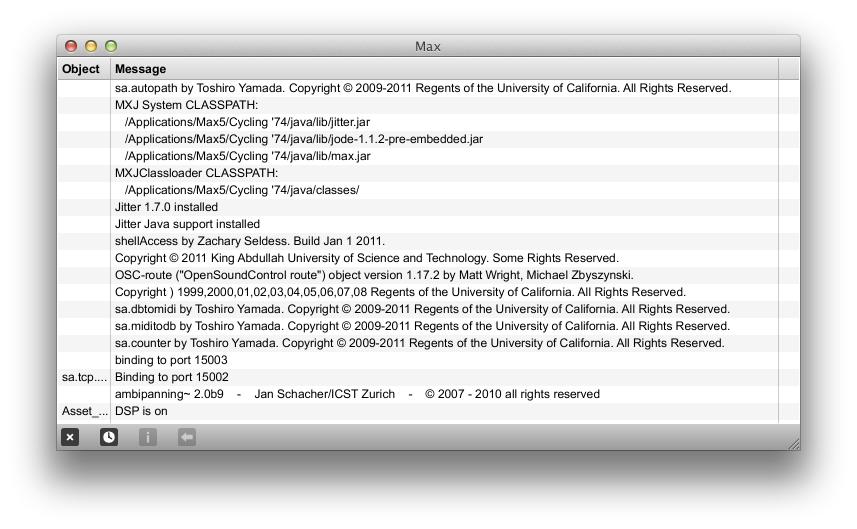
At this time, it is a good idea to check the Max Window for any errors. When Asset Manager is successfully opened, you should see the follow messages.
Alternative to running Asset_Manager_LOADER.maxpat, Asset_Manager_PATH_ONLY.maxpat only setups the paths without opening the main window. This is often convenient for developing projects when you need to access Asset Manager's dependencies.
Asset_Manager.maxpat is the main Asset Manager program. You may notice that the file includes a bpatcher object linked to another file. This is to avoid any modification to the source file unintentionally.
2.6 What to read from here
Congratulations! Now you have Asset Manager installed and running on your computer. From here, we highly recommend you read section 3. Overview to learn about how Asset Manager deals with projects and how audio signals are routed. This is essentially for successfully creating projects.
If you are eager to dive right into making Asset Manager projects, you may read section 5. Creating Projects and then 4. Config Files to setup your project with Asset Manager. You may also want to read section 6. Creating Panner Objects to learn how to implement custom panners.